Bone Marrow aspiration and Biopsy: Standard technique

Indications for Bone Marrow Examination .
- Anemia -Persistent or severe nonmocytic anemia (in the absence of hemolysis or blood loss) -Macrocytic anemia without obvious etiology .
- Thrombocytopenia -ITP (some cases) -Unexplained thrombocytopenia
- Leukemia
- Leukopenia -Some undiagnosed cases of prolonged leukopenia
- Pancytopenia -Leukemia -Aplastic anemia -Neuroblastoma -Lymphohistiocytic disorders -Myelodysplastic syndromes
- Malignant Solid Tumors -Diagnostic and metastatic evaluation of some solid tumors
Disorders in WhichMarrow ExaminationUsually Is Not Necessary
- Microcytic anemias
- Normocytic anemias dueto hemolysis or blood loss
- Mild normocytic anemiasassociated with acute illnesses
- Most macrocytic anemias
- Reactive lymphocytosis
- Storage diseases
- Leukocytosis in the absenceof blasts or neutropenia
- Thrombocytosis
Standarized Procedure for Bone Marrow Aspiration and cytology-
Materials required:
- 1. Lidocaine cream with occlusive dressing
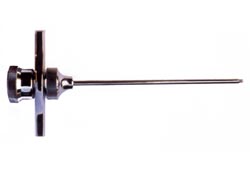
- 2. 16-gauge 2-1/2 or V bone marrow needle
- 3. (3) 10ml syringes
- 4. 25-gauge needles
- 5. 20-gauge needles
- 6. 4 x 4 and 2 x 2 gauze pads
- 7. Povidone-iodine swabs
- 8. Sterile drapes
- 9. Lidocaine 1% multidose vial
- 10. Alcohol swabs
- 11. Elastoplast adhesive, or other pressure dressing
- 12. Sterile gloves

Procedure:
1. Prior to the procedure
• Obtain consent for procedure.
• Notify hematology to schedule BM tech.
• Determine and obtain appropriate type and dose of sedation and pain medications.
Schedule child for anesthesia if elective and child/adolescent have no contraindications for anesthesia.
Instruct patient/family in NPO requirements.
• Prepare the patient for the procedure:
2. Apply Lidocaine cream 1-2 hours prior to the procedure: either the staff RN
or the NP should apply the cream on the right or left iliac crest, covering an
area of approximately 3-4 cm in diameter. A transparent occlusive dressing is
then applied.
3. At the time of the procedure:
• Wash hands.
• Assemble supplies and medications, checking expiration date on BMA tray.
• Complete a time out with all elements of the preprocedure process.
• Administer sedation medications, monitoring vital signs, pulse oximetry,level of sedation.
• Remove outer wrapping from bone marrow tray using clean technique.
• Position patient in prone or side-lying position.
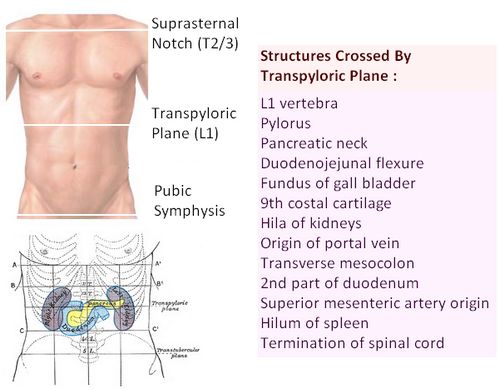
• Expose area for aspiration and locate posterior superior iliac crest.Remove Lidocaine from aspirate site. A towel roll or small pillow placed under the hips may allow easier location of the iliac crest.
• If necessary, a member of the nursing staff will help secure the patient’s position.
• Position the parent near the child’s head in order to more easily comfort the child during the procedure.
• Expose contents of bone marrow tray using aseptic technique.
• Put on sterile gloves.
• Swab bone marrow site with povidone-iodine swab stick, applying some friction and working in a circular motion beginning in the center and moving outward. Repeat x 2 with new swabs.
• Allow povidone-iodine to dry.
• Remove povidone-iodine with alcohol swab using concentric motion beginning in the center. Repeat with new swab x 2 (optional).
• Allow area to dry.
• Apply sterile drape.
• Draw up 2-3ml lidocaine 1% from a vial held by an assistant into a 3 ml syringe with a 22 gauge 1 ” needle.
• Location exact point for aspiration and outline area between thumb and index finger.
• Perpendicularly inject lidocaine subcutaneously and into periosteum. Avoid injecting too much and obscuring landmarks.
4. While allowing 2-3 minutes for lidocaine to take effect:
• Prepare bone marrow needle, assuring stylet moves freely.
• Prepare (2) 10ml syringes, assuring plungers move freely. Remove top from one syringe and set aside. Prepare second syringe (if needed for special studies) using 0.2ml heparin and rinsing inside of syringe. Set aside.
• Stretch skin taunt over puncture site, keeping crest between thumb and index finger of one hand.
• Holding bone marrow needle with stylet in place, puncture skin and advance through subcutaneous tissue, periosteum and into marrow cavity using a steady, controlled pressure with a twisting motion. When the needle is firmly in place and a slight give in pressure is felt, the cavity has been entered.
• Remove the stylet and quickly attach the plain syringe to the needle hub.
• Apply strong, quick suction and obtain approximately 0.5ml marrow.
• Hand syringe to the lab technician.
• Obtain other samples with heparinized syringe as needed.
• Remove needle with syringe attached with slight twisting motion.
• Maintain pressure over site approximately 2 minutes until bleeding has stopped.
• Meanwhile, remove sterile drape and cleanse povidone-iodine from skin with alcohol swab to avoid burn.
• Apply dry 2×2 gauze folded into quarters and secured with tightly stretched Elastoplast.
• Praise the patient’s cooperation.
• Inform patients / parents and child of marrow result when obtained.
5. Patient conditions requiring consultation:
• Unusual bleeding, pain or signs/symptoms of concern to the practitioner will be brought to the attention of the responsible fellow or attending physician.
• After two unsuccessful attempts by the NP, a fellow, attending or another NP will complete the procedure.
6. Patient education:
• The parents and/or patient are instructed to remove the dressing after 24 hours, observing for signs of infection, unusual bleeding, or any other drainage on the dressing. If either is noted, the practitioner should be informed. The site should be checked daily thereafter until healed for signs of infection.
• It is not unusual to feel an aching or bruised feeling for several days after the procedure. This may be relieved with a warm pack. The nurse practitioner should be notified if pain persists beyond several days or worsening pain.
V. Documentation
A. Inpatient documentation is in the UCARE procedure note and outpatient will be in the event note.
1. Documentation of the pretreatment evaluation
2. Record the time out, procedure, the outcome, patient tolerance, medications given, and the plan in the progress note.
References-
American Academy of Pediatrics Journal.
http://www.ucsfmedicalcenter.org/medstaffoffice/Standardized_Procedures/Bone%20Marrow%20Aspiration.pdf


